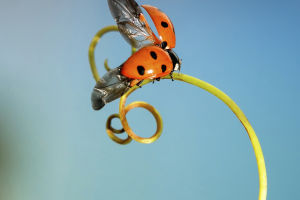
Hey Lykkers! Have you ever picked up a beetle or watched a butterfly and wished you could keep that moment forever? That's where insect specimen preparation comes in.
It's not just for science labs or museums—we can actually do it at home with a little care and patience. Whether you're into biology, art, or just love tiny details in nature, learning how to prepare insect specimens is a rewarding and surprisingly calming hobby.
First, Let's Get the Right Tools
Before we start, let's talk tools. We don't need anything too fancy, but having a few basic items makes things easier. Here's what we'll want to prepare:
• Insect pins (special ones that don't rust)
• A spreading board (especially for butterflies and moths)
• Soft tweezers or forceps
• Small containers with tight lids
• A killing jar (we'll explain this gently below)
• Drying box or foam boards
• Labels and fine pens
Most of these tools can be found in science stores or ordered online. Just make sure everything is clean and dry before we begin.
How to Catch Insects Properly
When we go out looking for insects, it's best to head to parks, gardens, or fields early in the morning or around sunset. That's when many insects are active but slower and easier to catch. We can use small nets or simply cup them gently into a container.
Quick tip: don't try to catch everything you see. Focus on unique shapes, colors, or behaviors—and make sure we're not taking too many from the same area. Respecting nature is always part of the process.
The Gentle Goodbye: Preserving the Insect
Once we've caught an insect, we need to prepare it for preserving. This part needs to be done gently and respectfully. A simple “killing jar” can be made using a glass jar with a bit of paper soaked in nail polish remover. Place the insect inside, close the lid, and wait for it to rest peacefully.
We should only keep the insect in this jar for 10–20 minutes. Once it's still, we take it out and place it on a clean surface.
Pinning: Getting the Shape Just Right
Now comes the fun part—pinning and posing. For beetles and other hard-bodied insects, we gently insert the pin through the middle of the thorax (the part between the head and wings). Make sure it goes straight down and the insect sits halfway up the pin.
For butterflies and moths, we use a spreading board. Place the pin through the thorax, then carefully open the wings using pins and strips of paper to hold them flat. It can be tricky at first, but don't worry—patience really helps here.
Dragonflies, grasshoppers, and wasps also need special attention. Some people even pose their legs and antennae for a more natural look.
Drying and Waiting
Once pinned, the insects need time to dry. This can take 5 to 10 days, depending on the insect and the weather. We keep them in a cool, dry place away from direct sun. A foam board or drying box is perfect for this. Be sure to protect them from ants and small critters that might try to snack on them!
Labeling: Every Detail Counts
Every specimen we prepare becomes more meaningful when we add a little info. We can make tiny labels with:
• Where we found it
• When we found it
• Who collected it (that's us!)
This helps us remember the story behind each insect, and if we ever share or display them, others will appreciate the details too.
Our Tiny Museum at Home
Once dry, we can keep our specimens in display boxes, shadow frames, or clear containers. Add labels and arrange them however we like. Some of us might even build a themed collection—like “butterflies of summer” or “beetles of the backyard.”
This isn't just about collecting; it's about seeing the world in a new way. Suddenly, every park trip becomes a little adventure.
Let's Make It Personal
Lykkers, have you ever tried making your own insect specimen? Or maybe you've admired some in a science museum and wondered how they were made? This could be a fun and hands-on hobby to try on a quiet weekend—or even as a family project.
If you start your own insect collection, share your favorite find with us! We'd love to hear the story behind your coolest catch.
Let's keep exploring the little things that make our world amazing—one tiny wing at a time.


